Week 3 - Cinema 4D - Modelling, Texturing & Rendering
In this session, we had a recap of cinema 4D, modelled a white blood cell, textured the red blood cells and rendered the final red blood cells using RedShift.

Starting off, we modelled a white blood cell using a reference from google. We used the sphere shape tool, changed some settings and resized it so it was a realistic size compared to the red blood cell.

We then played around with noise, adding it to the white blood cell to give it some texture, and used various different things such as cloners to duplicate the cells, and animated them using difformers. Then, we added a randomiser and turbulance to the white blood cells too, to make them move slightly.

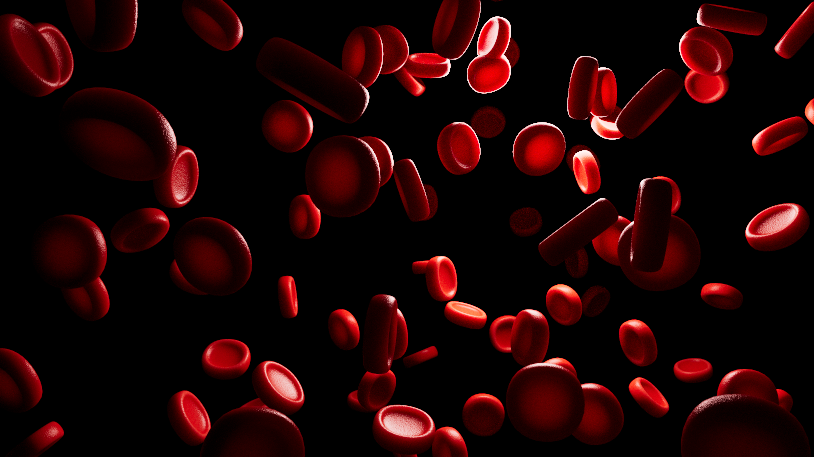
Once we'd done this, we started the texturing / lighting process for the red blood cells. After isolating the blood cell, we smoothened it out by giving it more polygons, then added a light map so we could simulate realistic lighting.

We then used RedShift and opened the render window in order to see how the lighting and materials would look once rendered, using a progressive render system.

Instead of grabbing a pre-made texture Jon taught us how to make our own, so the next part of the process was using the nodes to create our own texture for the blood cells. We started by adding a red metallic finish to the blood cell and then added noise, as well as a bump map, to really add texture to the blood cells.

Once we added the texture, we then added everything back in and let the view render, creating this final piece!